
Free pattern - Crochet Wallet
Free Pattern
Crochet Wallet
What about to crochet your own wallet and use the colors, style and design you want?

A few weeks ago I needed to buy a new wallet and I thought about making one myself, so, I started working on this new project. I tried to add enough space for cards (I have a lot) and secured the closure with two clasps.

This wallet has 4 card holders and space for money. I tried to use neutral colors and put some flowers to decorate it.

Let´s start!
Materials:
° Gray yarn, Catania
° Dark Gray yarn, Catania
° Cream yarn, Catania
° 2.5mm crochet hook
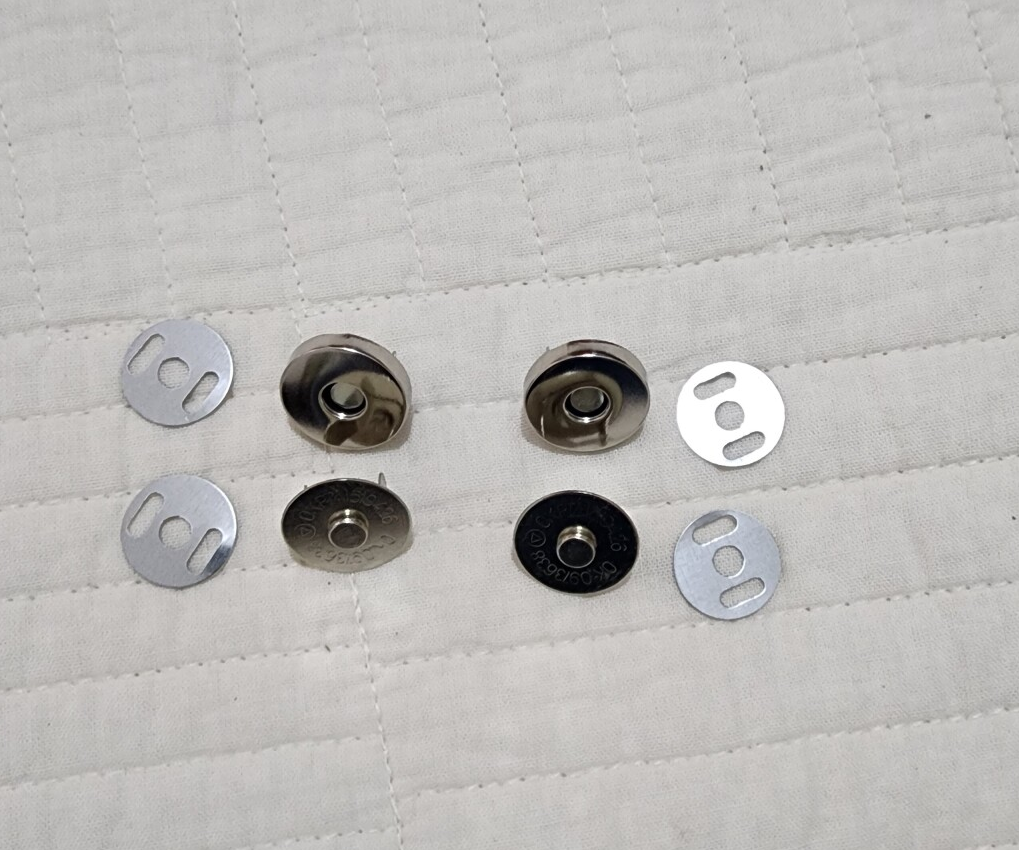
° 2 pair of clasps
° Tapestry needle
° Embroidery yarns as your wish (I used green, pink, yellow and purple from Olycrafts yarns 100% cotton)
General info:
- The wallet is about 9cm x 20cm.
- Try to use mercerized cotton because is more resistant than 100% cotton or acrilic.
- The wallet was crocheted in sc “X"
- For embroider I use Olikraft Premium Cotton (green, light rose, light yellow and purple)
- Try to use mercerized cotton because is more resistant than 100% cotton or acrylic.
For crochet the wallet:
With cream yarn: 52ch, starting on second loop from hook 50sc, at the end of every row, turn around the work, make 1ch and continue crocheting. With these secuence we gonna crochet 93 rounds using cream and gray yarn distributed as can be seen in the next picture:

Notice that we have to crochet 1 additional cloth in cream yarn (13 rows). Then you gonna join it to the main cloth (part 3).

When the
wallet is completely crocheted, we have to fold some parts
- 1
and 2 means that you have to fold this part (fold in, inwards)
- 3
means that you have to put this little cloth over part 1
- 2
and 3 are cardholders
This wallet
has 4 card holders and space for money. I tried to use neutral colors and put
some flowers to decorate it.


Now, we are
ready to assembly.
Fold and fix every part of the wallet with pins and crochet with sc the borders. Use dark gray yarn.

Put the little cloth over the big cream part and crochet it at the same time you are crocheting the borders.

When you
finished crocheting the borders, it´s time to put the clasps in both corners for
keep the wallet close.
I used 2 pairs of claps (PIC#07 & 8)
No sewing required, just bend the hooks to secure the clasps.

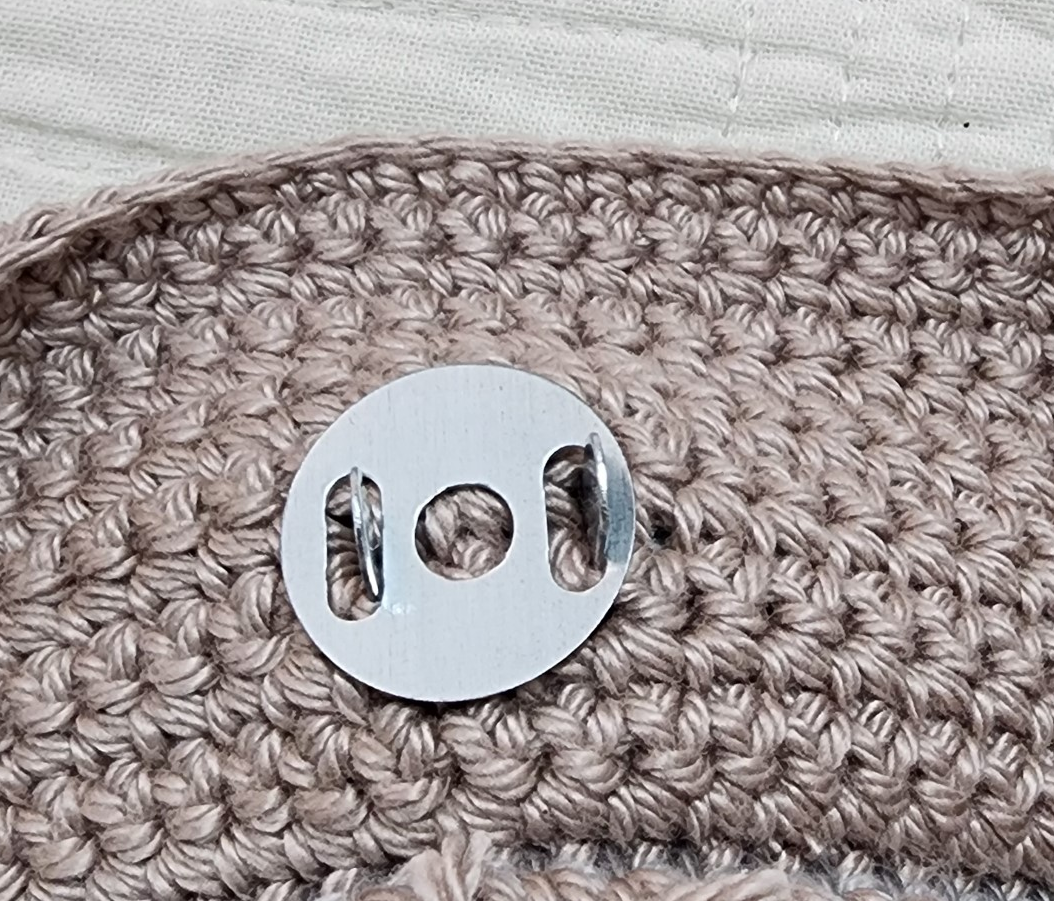

With the same 2.5mm hook and gray yarn, you gonna join every part of the wallet (the little cloth and the part we have to fold), so we have to crochet sc all around the edges.
Finnally, sew some stitches in the center of the card holders to divide then. The result will be 4 spaces.


Time to embroider...
For decorate the wallet I crocheted 2 leaves and embroidered 3 flowers.
Leaf 1:
14ch, 1sc + 1hdc + 1dc + 6 double dc + 1dc + 1hdc + 2sc, continue in the other side, 1hdc + 1dc + 6 double dc + 1dc + 1hdc +1sc, close with a sliptstich.
Leaf 2:
7ch, 1sc + 1hcd + 1dc + 1hcd + 2sc, continue in the other side, 1hcd + 1dc + 1hcd + 1sc
Flowers:
The purple flower is about 3cm diameter, and the others about 1.5cm. Using a pen, draw 3 circles over the front part of the wallet. This embroidery technique is Spider web rase, and I added this video for more details: Embroidery technique
Sew them to the wallet. I prefer to put them in the right corner.
.
.
.
.
.
I´m working on a new pattern and I will upload it very soon!
.
.
.
.
.


Comentarios
Publicar un comentario